
Light Renovations in Cumming: Restoring Walls and Trim After Built-In Removal
Removing built-ins can expose more than an unpainted wall. Learn how to plan drywall, trim, primer, and paint together for a consistent finished room.
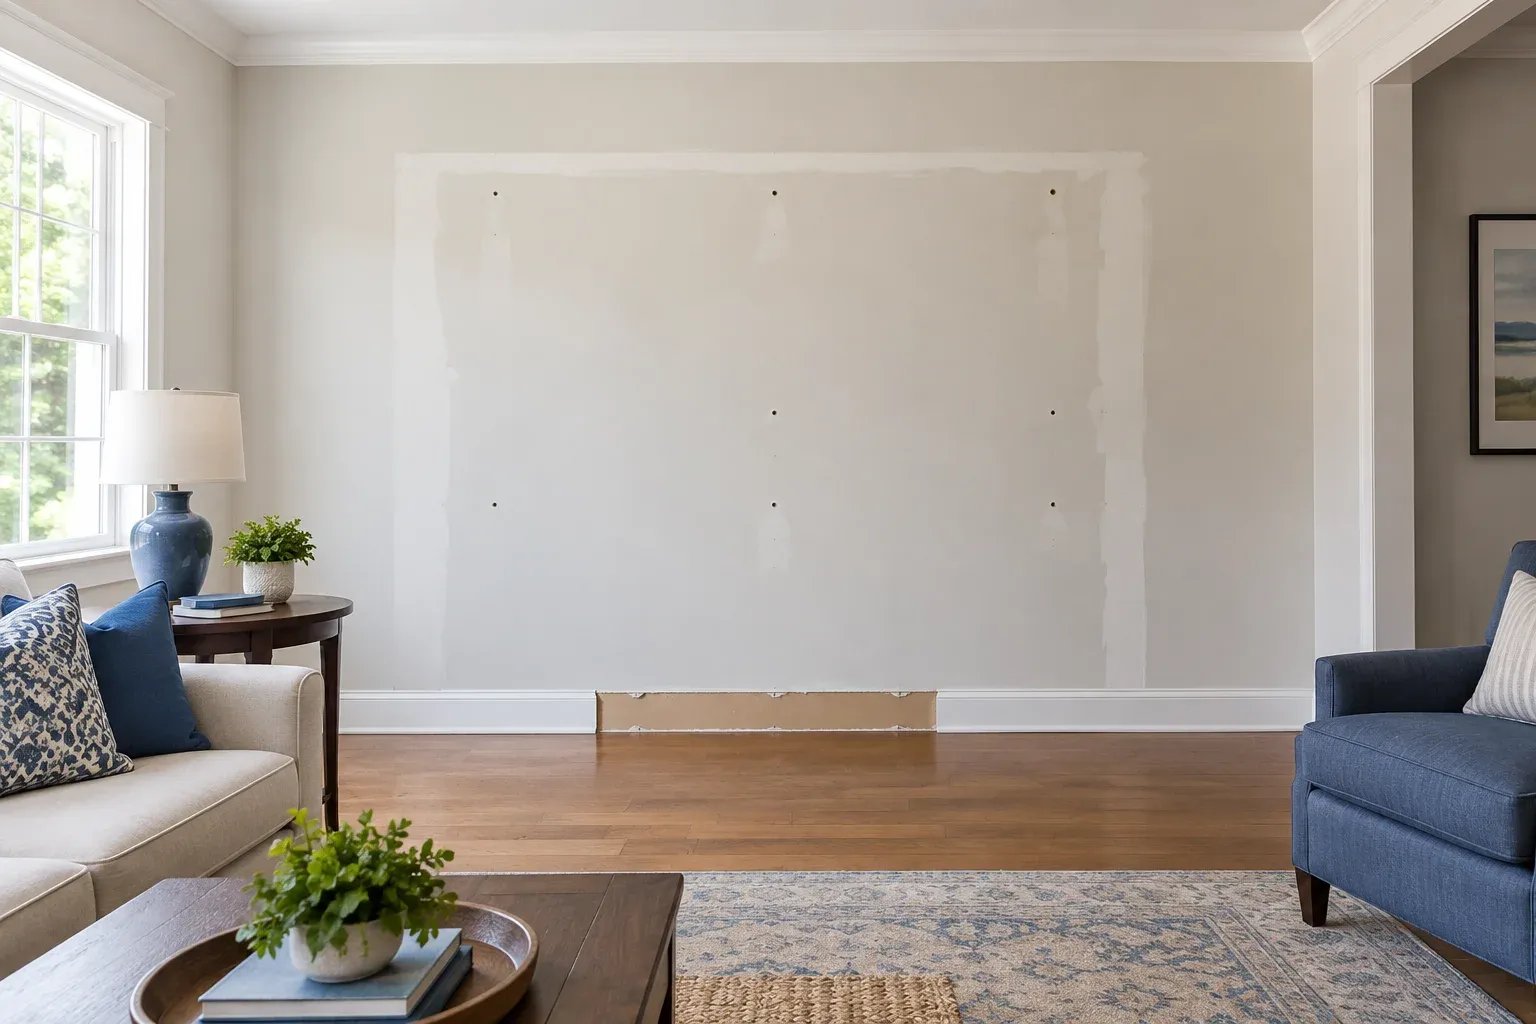
Plan the finished wall, not just the empty space
Light renovations in Cumming often begin with a room that already feels more open: the built-in shelves or cabinets are gone, but their footprint remains. Old paint outlines, torn drywall paper, shallow dents, and missing baseboard can make that newly exposed space look unfinished. For homeowners planning to enjoy the room for years, the useful question is not just which paint color to choose. It is how the wall and trim will become one coherent finished surface.
A painter-led scope can bring localized repairs and decorating decisions together, provided the work stays within clearly agreed limits. The same planning applies to a home office, a professional office, or a customer-facing room where removed storage has left visible marks. This guide focuses on surfaces exposed after removal, rather than demolition or structural alterations. When discussing light renovations, describe the desired finished wall—not merely the number of holes that need filling.
Read the marks left behind
Start by looking at the former built-in area in daylight and under the room’s usual lamps. A rectangular outline may be a color difference, a raised paint edge, adhesive residue, or some combination of these. Screw holes are usually straightforward to identify, but broad shallow depressions can be harder to see until light crosses the wall at an angle. Photograph the whole wall and the individual defects so the estimate can distinguish surface preparation from actual drywall repair.
Check the bottom edge as carefully as the center. Some built-ins interrupt the baseboard; others conceal a complete trim run that now needs cleaning and repair. Flooring may also stop at the former cabinet footprint. That is a separate issue from painting and should not disappear into a vague preparation allowance. Staining, soft material, or recurring cracks also deserve assessment before cosmetic work proceeds, because a coating cannot resolve the condition causing the damage.
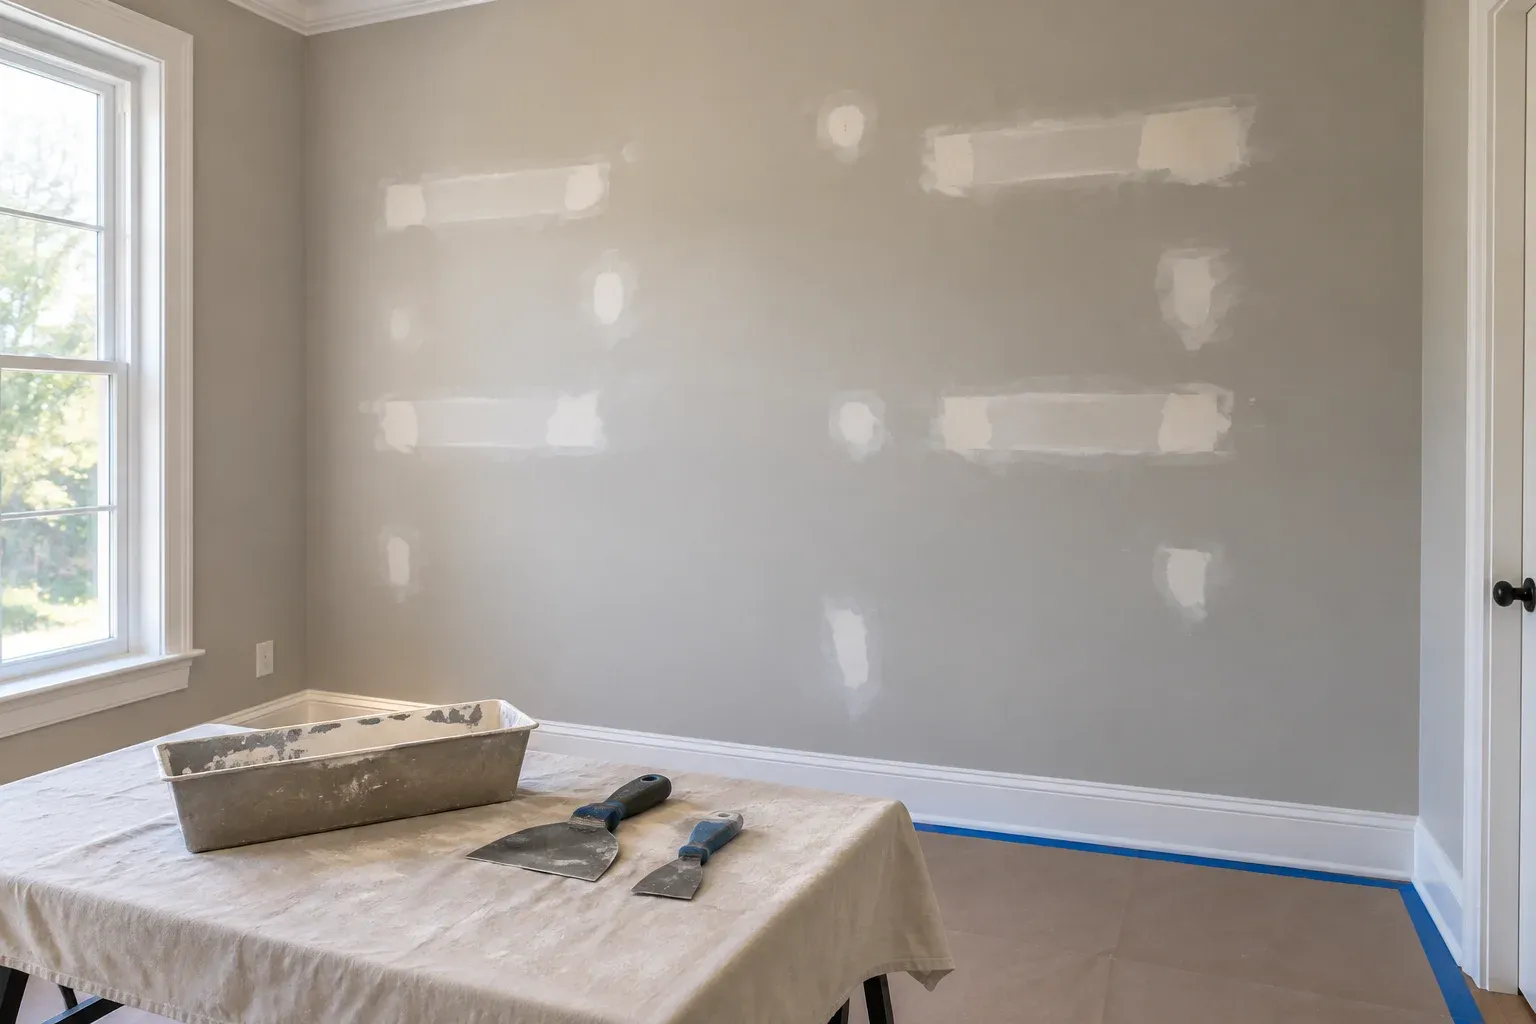
Give drywall repairs a clear boundary
Define localized drywall repairs by their location and condition, not just by calling them patches. Small screw holes, torn facing paper, an opening through the board, and a long ridge where cabinetry met the wall require different preparation. Larger openings may need a supported replacement piece rather than filler alone. For damaged paper, the scope should address stabilizing the affected surface before building up repair material. These distinctions help prevent an apparently simple estimate from overlooking the work needed underneath the finish.
The repair area may need to extend beyond the visible defect so its edges can blend into the surrounding wall. Ask whether drywall repair includes feathering, surface refinement, and matching the existing texture where practical. On a smooth wall, even a slight hump can catch window light; on a textured wall, an overly smooth patch can stand out just as clearly. A useful scope describes the intended surface appearance and acknowledges that some existing textures are difficult to reproduce exactly.
- Mark screw holes, torn paper, larger openings, and raised outlines separately.
- Identify whether the surrounding wall is smooth or textured.
- Specify the wall area included in blending and preparation.
- Clarify how newly exposed damage will affect the agreed scope.
Restore a continuous, consistent trim line
A baseboard gap is not simply an empty length to fill. The replacement should relate to the existing profile, height, thickness, and any shoe molding along the floor. A piece that is almost right can look wrong once everything receives the same paint. Keep an intact sample or clear profile photograph available for discussion. If matching material cannot be found, replacing a continuous run between corners or other natural endpoints may produce a more consistent result than a short mismatched insert.
Include the connection details in the trim repair scope: where new material joins old, which damaged sections remain, and how the completed run will be prepared and painted. Small finish gaps at suitable trim junctions may be addressed with paintable caulk, but caulk should not substitute for missing wood or a poorly fitted piece. Also decide whether paint will cover only the replacement or the complete baseboard run. Existing wear and differences in sheen can make that boundary noticeable.
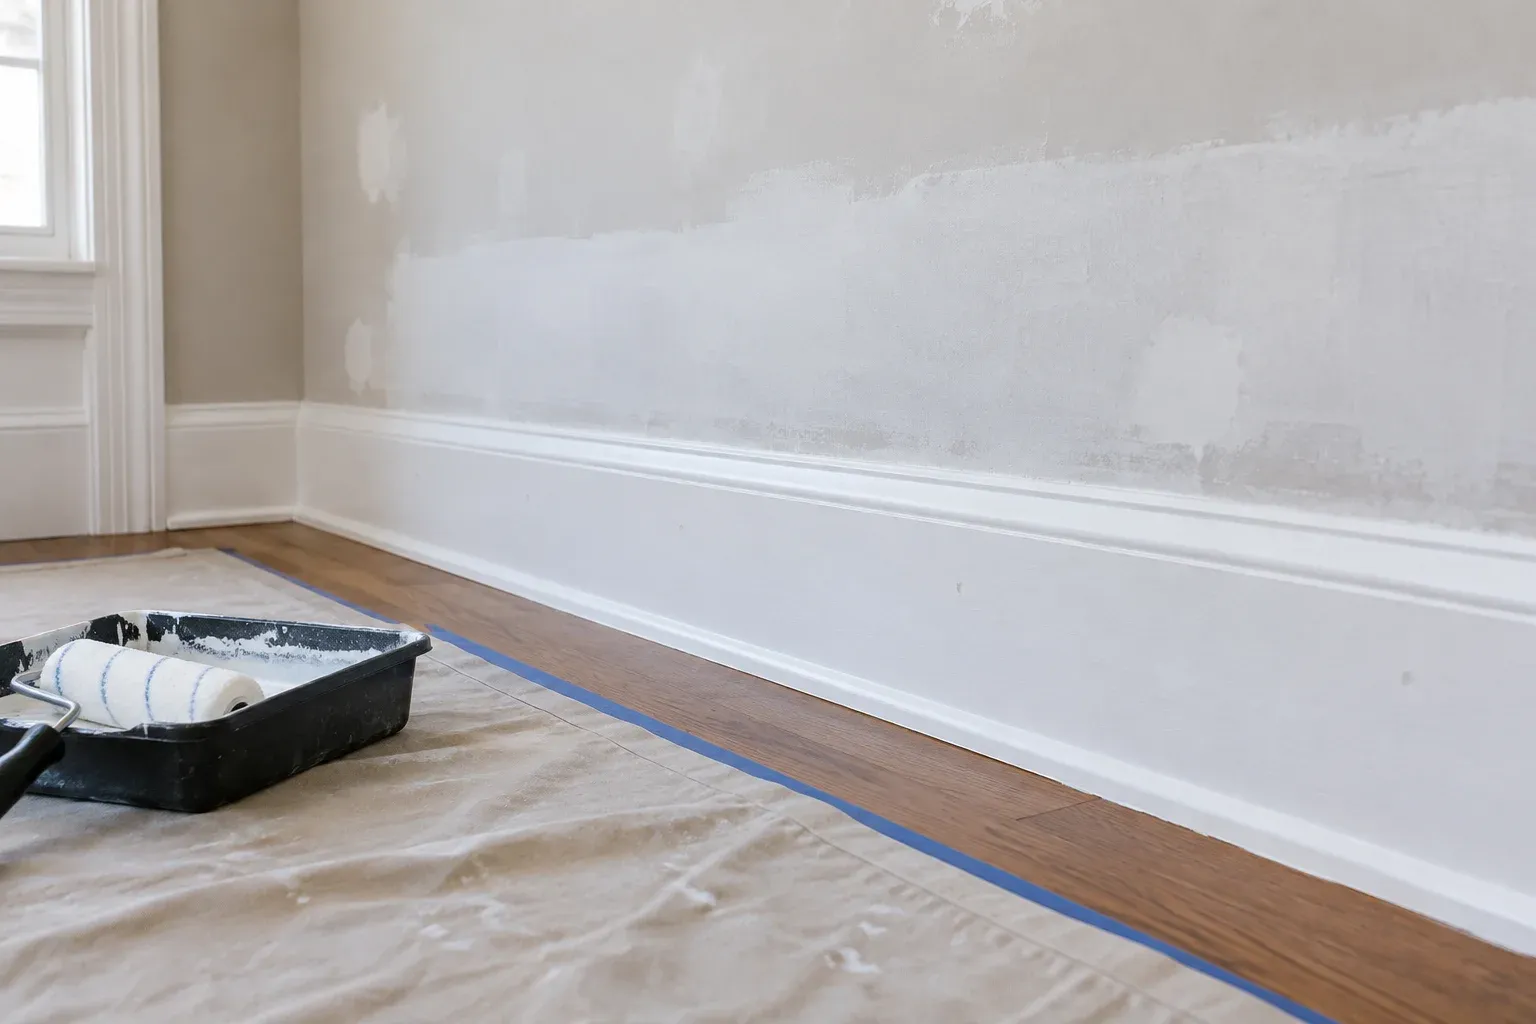
Treat preparation and primer as part of the paint decision
Preparation, priming, and finish paint solve different problems. Preparation addresses the shape and condition of the surface. Primer helps create a suitable base for the finish coating, including differences between porous repair material and existing paint. Finish paint supplies the final color and sheen. Painting over a repair without considering those layers can leave a patch that looks different even when the color is correct. Primer selection should suit the exposed material and the coating system rather than follow a one-product-for-everything assumption.
Fresh repairs can absorb paint differently from the surrounding wall, producing a duller or otherwise uneven-looking area. Priming helps manage that difference, but it will not flatten a ridge or recreate missing texture. Those problems need attention before the finish coats. Ask whether the primer coverage will be localized or broader and why. The appropriate choice depends on the extent of repairs, the condition of the existing coating, and any remaining surface differences across the former built-in footprint.
Choose paint boundaries that make visual sense
An isolated touch-up can remain visible because the original paint has aged, the repair has a different texture, or the new application leaves a different surface pattern. Even saved paint is not a promise of an invisible match. For a broad built-in outline, repainting the complete wall from corner to corner is often the more practical starting point. It places the finish boundary at an architectural break rather than in the middle of a surface that receives uninterrupted light.
Complete-wall repainting does not automatically mean repainting the entire room. Review the neighboring walls, available paint information, sheen, and lighting before expanding the scope. A single wall may be sufficient when the remaining surfaces are in good condition and the color relationship is acceptable. If a different sheen or color is planned, discuss how that choice will read at the corners. Interior house painting decisions should follow the repaired surface and the homeowner’s expectations, not an assumption that every room needs identical work.
Agree on the complete scope before work begins
Before approving the project, review the estimate as a sequence: exposed-surface assessment, agreed drywall repairs, trim restoration, primer, and defined finish-paint areas. Identify who handles any flooring gap or utility changes, since those may fall outside a painter-led scope. Discuss access, furniture protection, drying intervals, and when the room can be put back into use. A room-by-room description is more useful than a broad promise to make everything look new, especially when the surrounding finishes will remain.
For light renovations in Cumming, the strongest plan connects each repair to the finished appearance of the room. Give Alpharetta Painters and Stainers (Paint and Stain) clear photographs, the wall dimensions, and your expectations for trim continuity and repainting boundaries when making an inquiry. Then confirm the specific work in the proposed scope. Treating the former built-in footprint as part of a complete wall—not a collection of unrelated touch-ups—helps you make informed decisions before paint goes on.
Frequently asked questions
Can the area behind a removed built-in simply be touched up?
Sometimes, but a small touch-up may remain visible because the exposed area differs in texture, paint age, or sheen. After repairs and appropriate priming, repainting the complete wall often provides a more consistent finish. Inspect the wall in normal daylight before choosing the paint boundary.
Does missing baseboard mean all the room’s trim needs replacement?
Not necessarily. A localized replacement may work when the existing profile, height, and thickness can be matched. If a close match is unavailable, replacing one continuous run between natural endpoints may look more intentional than inserting a noticeably different piece.
What should a light-renovation estimate include after built-in removal?
Ask for identified wall repairs, texture treatment, trim repair or replacement, primer needs, and clear finish-paint boundaries. Also clarify whether flooring gaps or utility changes are excluded and how additional damage discovered during preparation will be handled.